Has your child’s car seat finally gotten to the point of no return? Whether it’s one big mess, or months of abuse, sooner or later you’ll have to figure out how to clean a Nuna car seat.
If you’re like me, with two active little ones, you know that car seats can quickly turn from neat to, well, let’s just say a bit of a disaster zone. From juice spills to the remnants of snack time, to my sons collection of pebbles — the list of both solids and liquids that lead to the messiness is never ending.
And this isn’t you’re average toddler item that needs spot cleaning, we’re talking about a contraption built to save your child’s life. Breaking it apart can be nerve wracking, knowing you’ll eventually have to put it all back together properly.
I’ve found Nuna to be a great brand, their website is full of helpful information when it comes to cleaning and disassembling their products. While tackling the car seat is a bit extensive, trust me, it’s not as daunting as it seems!
Key Takeaway
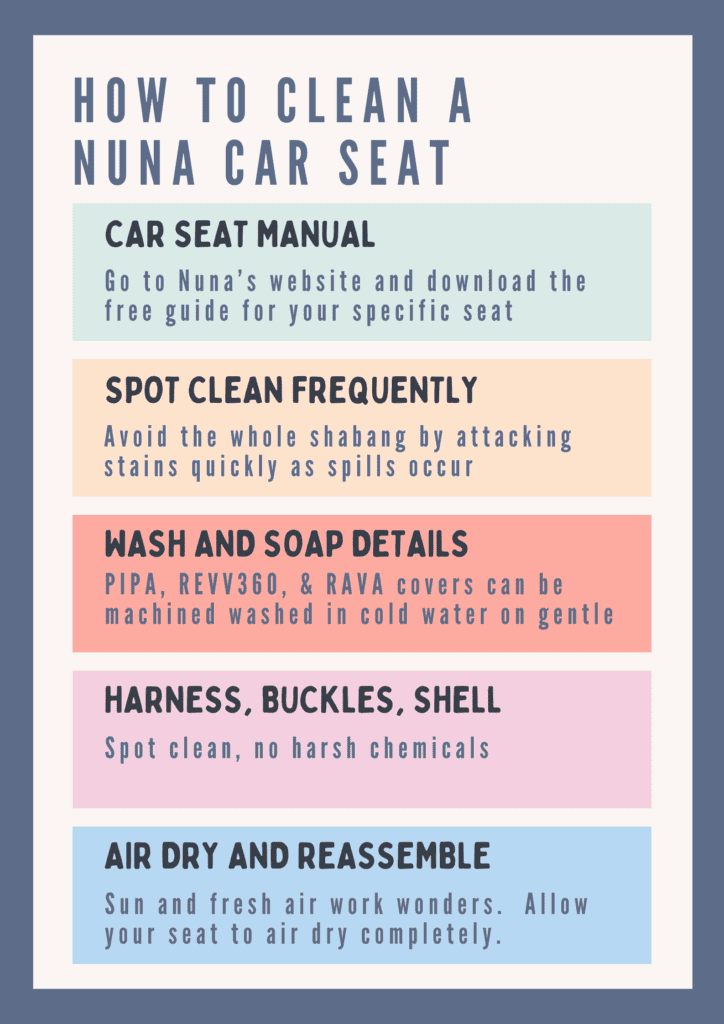
The entire breakdown and deep cleaning of my Nuna car seat is something I only do once or twice a year, unless the worst occurs, like a diaper blowout. To avoid the deep clean, try to hit the car seat with a damp cloth and the vacuum cleaner as needed throughout its lifespan.
When the worst does occur, know that time is of the essence — the longer spills have to set in, the harder they become to remove. Clean your child’s car seat quickly after an accident.
Car seat manuals are your bible — a must to determine which parts and pieces are suitable for machine wash, and which require hand wash. Guidelines for soap usage and car seat assembly can be found in the manual. Always avoid harsh cleaners, which are not good for your precious baby’s skin.
If you’ve lost your manual, visit Nuna’s website and download the free guide associated with your specific Nuna car seat.
Remember, direct sunlight and fresh air do wonders for damp odors. Nuna car seat covers can’t be tumble dried. Once wet, the cover will take about a day to air dry — try to pick a warm, sunny day and don’t plan on taking the kids anywhere.
Tackling the Spill Monster Right Away
The golden rule in the land of car seats, or really any stain removal, is to act fast. The sooner you deal with a spill or a stain, the better.
When your little one accidentally spills (or purposely dumps) their drink all over themselves, in that moment, you have a choice. Tackle the problem now or wait and watch as simple spills develop into tough stains.
I learned this the hard way when my daughter’s marker got stuck under her bottom during a long car trip home from vacation.
How she got her hands on a marker, typically not allowed in the car, I’ll never know. I noticed a blue stain on her shorts, but was too exhausted from travel to do a spot cleaning of the seat.
What could have taken a half hour ended up becoming a permanent blue stain on the car seat. The mom guilt of not acting faster still haunts me. Keeping baby wipes (non-antibacterial), paper towels, or a soft cloth handy in the car can be a lifesaver.
Your Car Seat’s Manual: A Treasure Map
I typically chuck the manufacturer’s instructions the second I’m done assembling. Welp, turns out there’s actually one worth keeping.
Every car seat is like a unique puzzle, and your manual is the key to solving it. Try not to lose your child’s car seat manual, because it’s full of specific cleaning instructions.
If you happen to have misplaced it (or, like me, deliberately threw it in the garbage), visit the Nuna website, download your manual, and also check out the ‘frequently asked questions’ portion associated with your specific car seat.
I’m a huge fan of the rotating car seat, and I loved my first REVV 360 so much that I ended up purchasing another one for my second child.
The whole process feels less intimidating with the manual handy. Nuna car seats have a lot of visuals and labeling on the seats themselves, which I like to refer to when taking the seat out or putting it back in the vehicle.
The Right Tools for the Right Job
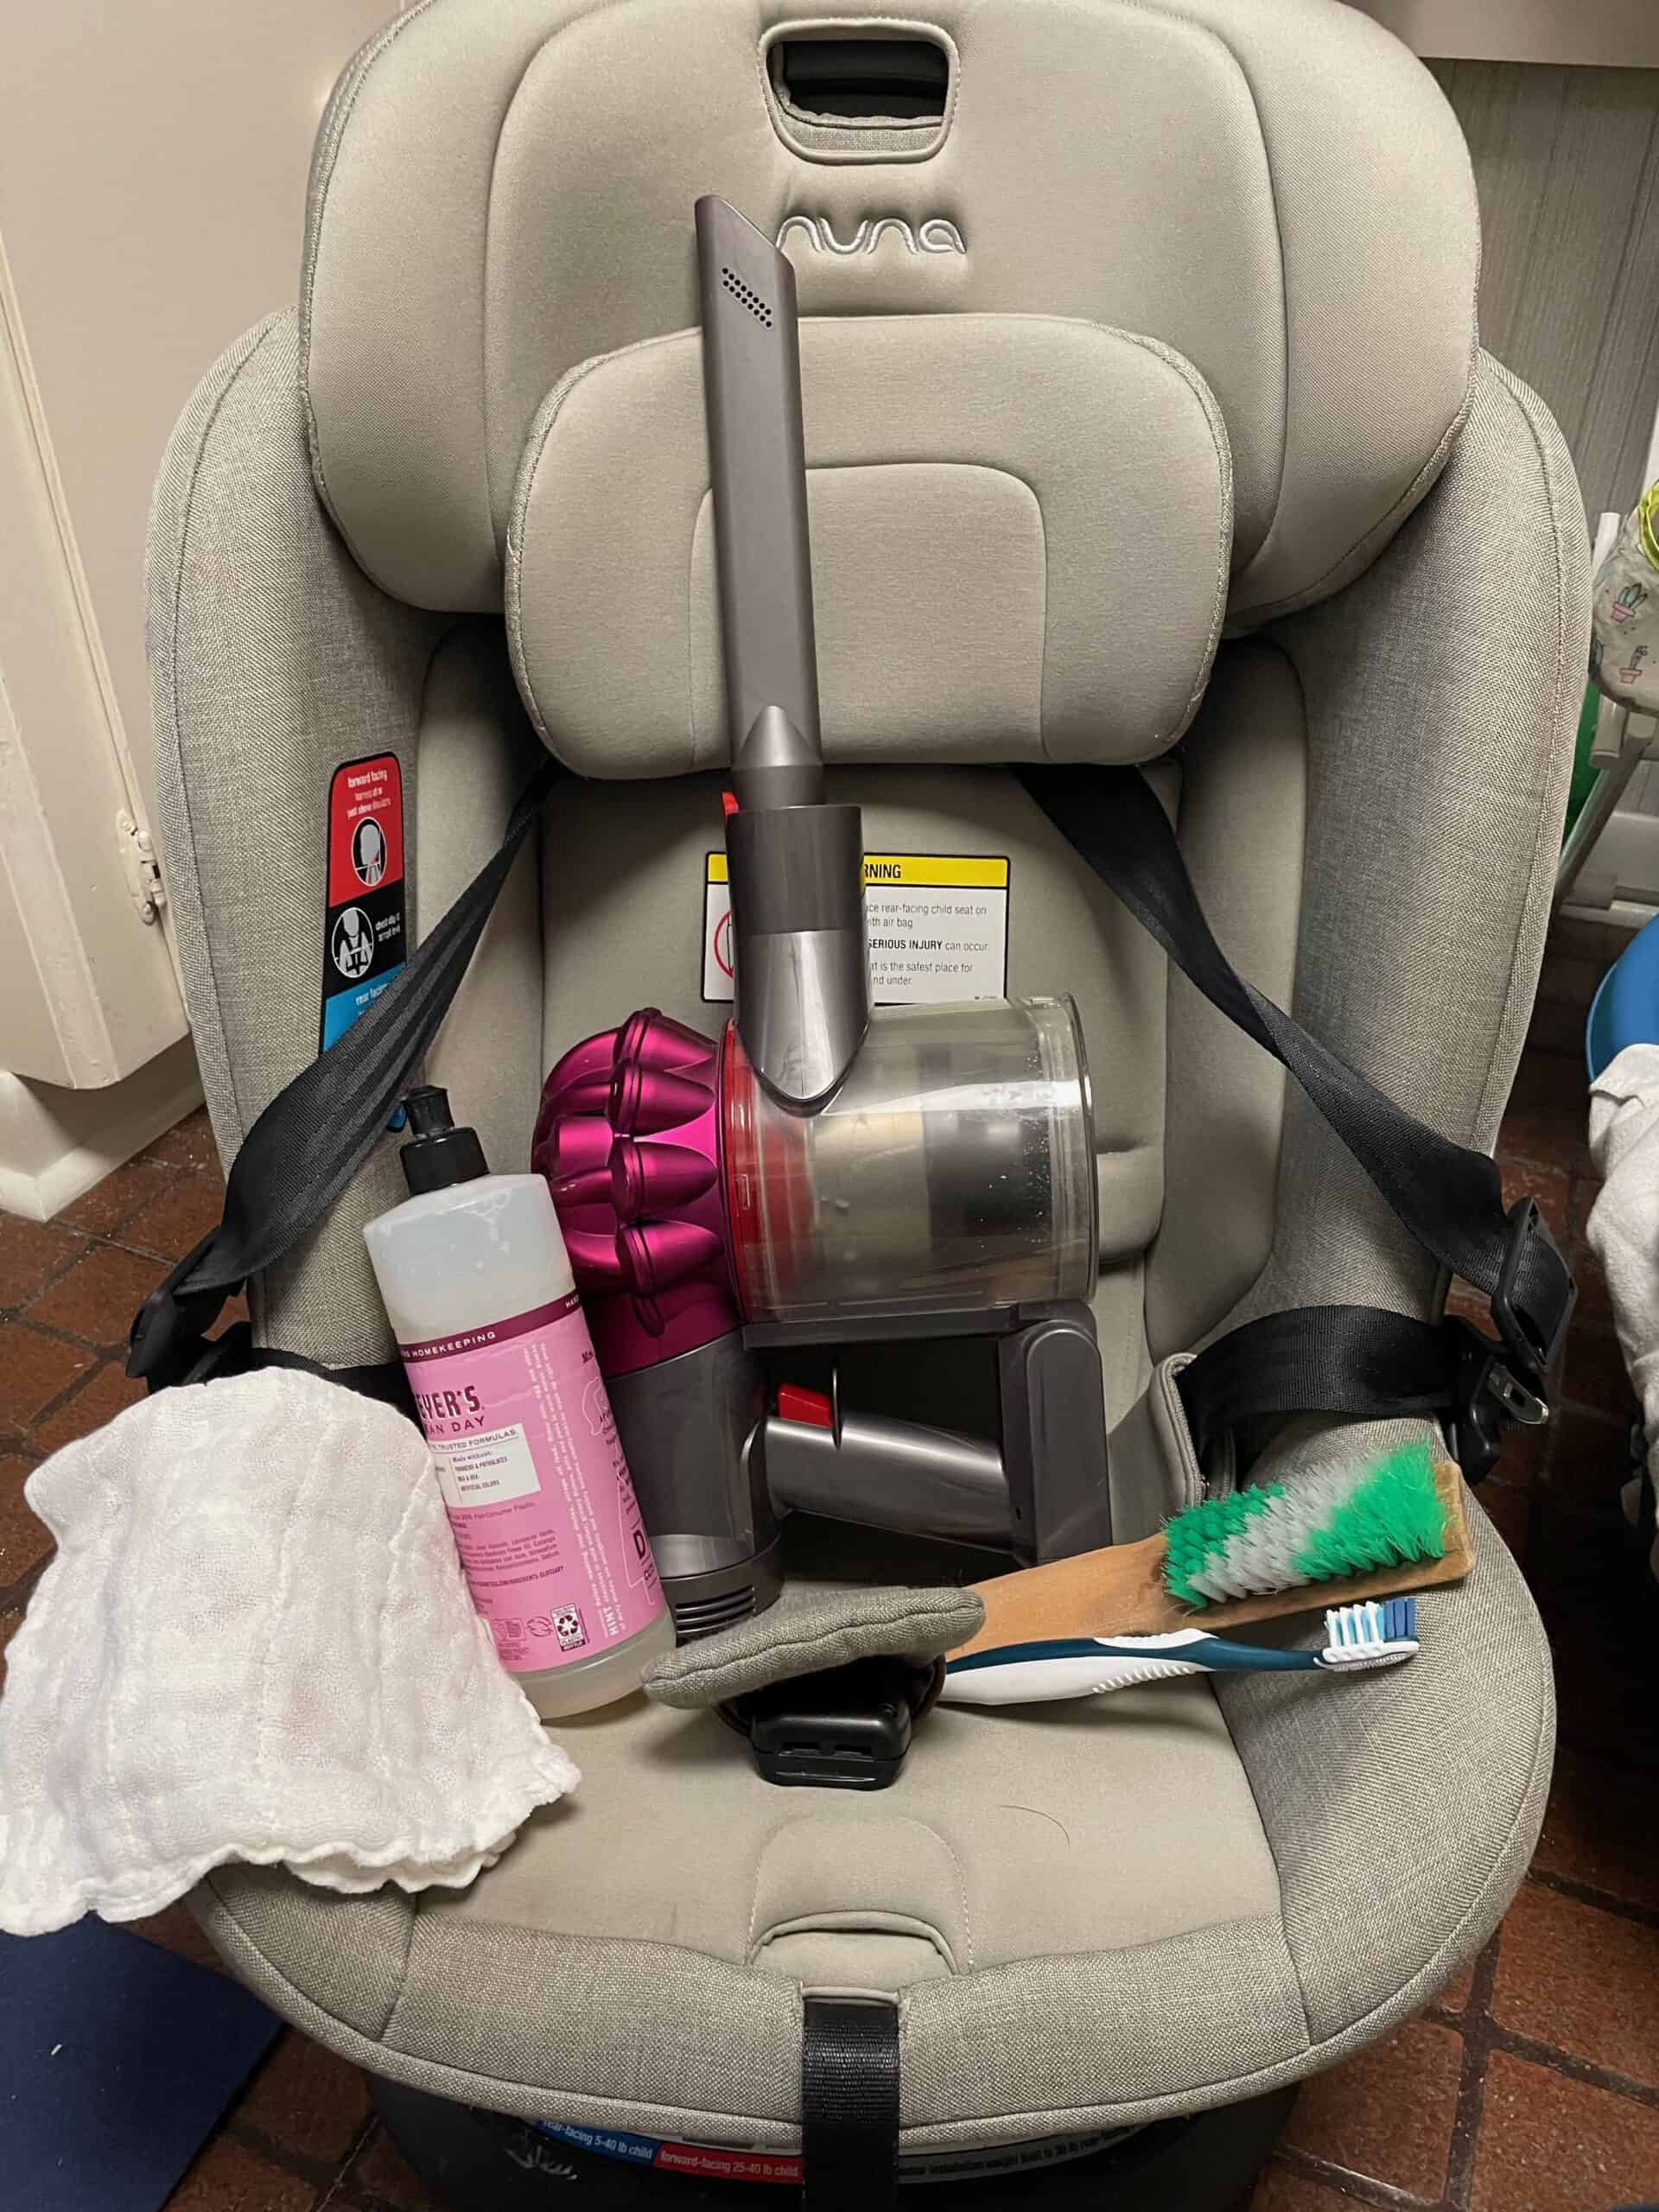
Here’s a checklist of what cleaning supplies you’ll need:
– Car seat manual for your specific Nuna car seat (PIPA, REVV 360, RAVA, or EXEC)
– Microfiber cloth, a sponge, and/or a small towel.
– A toothbrush (a bit of elbow grease may be required here).
– A small handheld vacuum (goodbye crumbs!).
– Spray bottle of warm water and some gentle soap (harsh chemicals are a big no-no).
– Laundry detergent (Nuna specifies ‘mild’)
The Step-by-Step Guide on How to Clean a Nuna Car Seat
1. Removing the Big Stuff
First step towards learning how to clean a Nuna car seat is lugging it out of the car, which in itself can be a confusing operation.
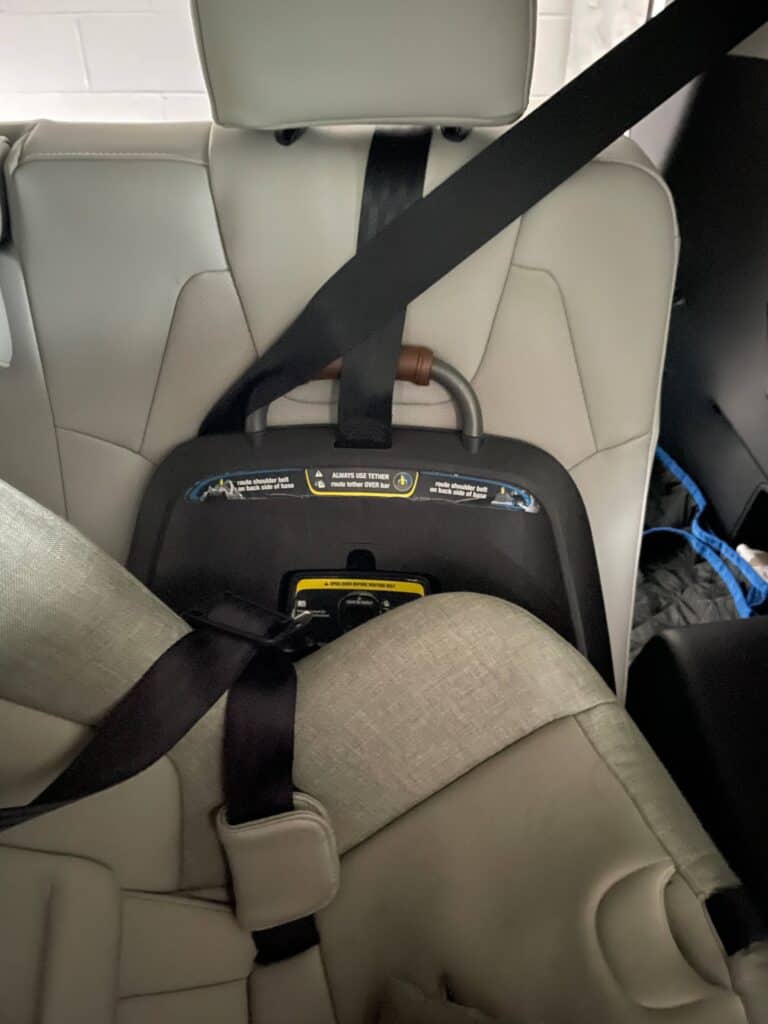
The back of the Nuna car seat has quick instructions on how to properly install, and what order of operations to follow. The REVV 360 must be rear facing or side facing to get to the locking mechanism.
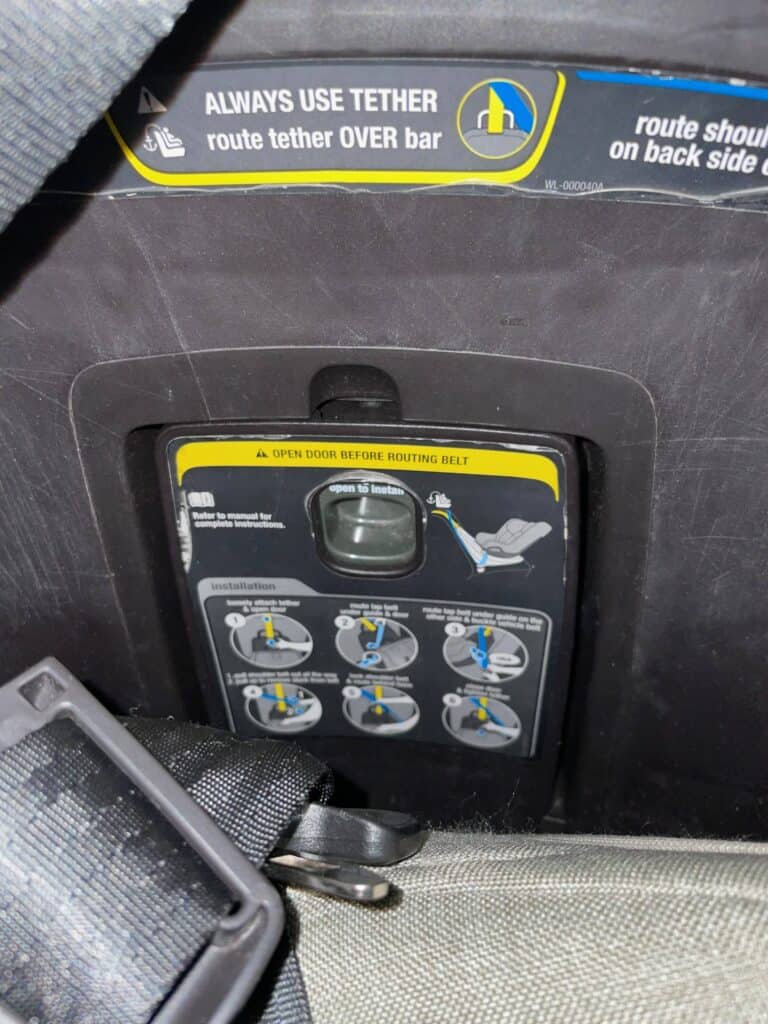
After the adult waist belt and shoulder strap are disengaged from your Nuna car seat, unclamp the latch from the back.
I love how Nuna provides this neat little cover to keep the belt tidy. Keep in mind, your setup may vary if you use the lower anchors instead of tether, be sure to consult the manual if that’s the case.
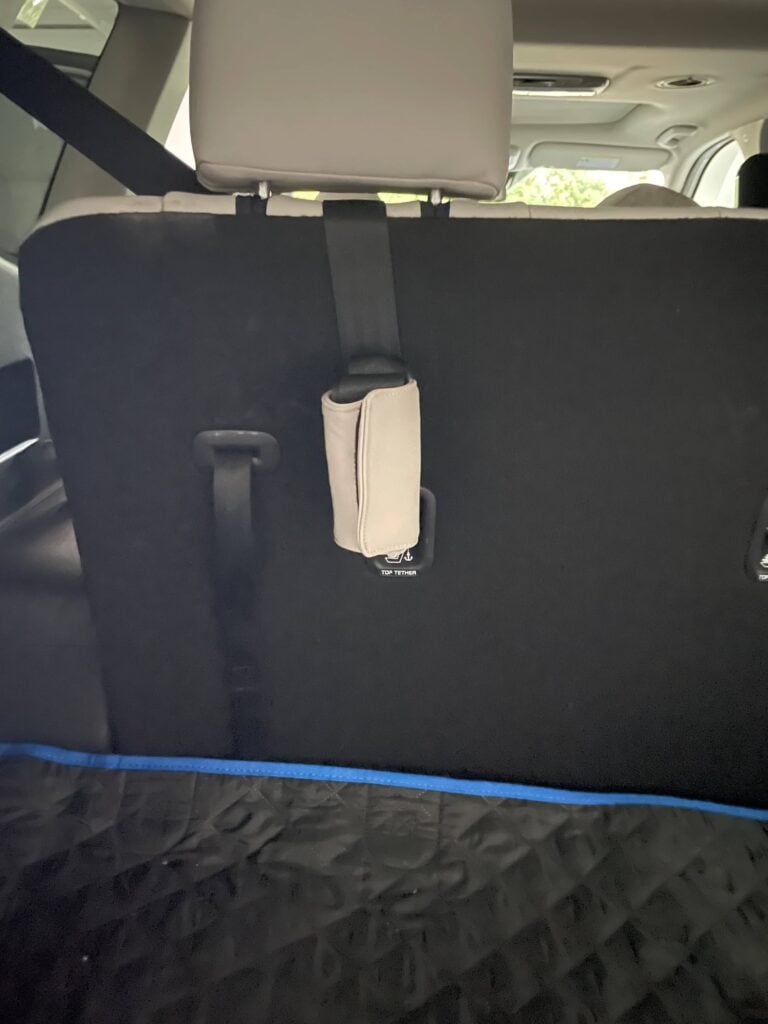
Pull the latch up through the headrest, swivel the seat to forward facing position (if it rotates) and you can now safely pull it out of the car.
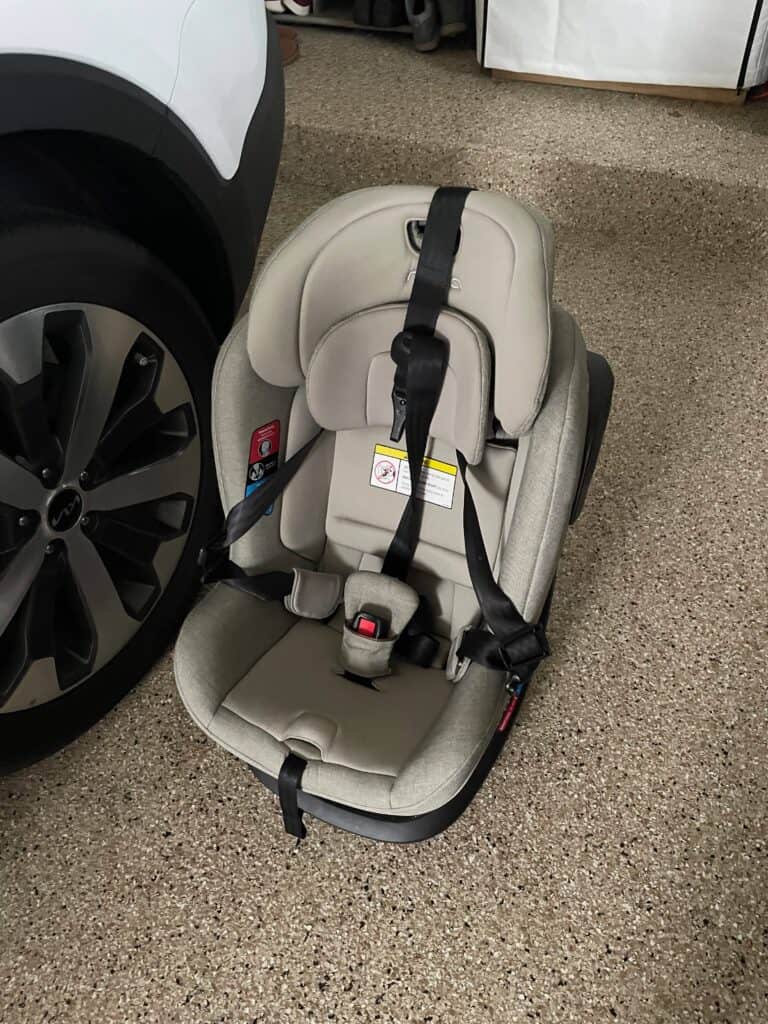
Once out, you can begin picking off any solid debris. I like to flip my REVV 360 over and give it a good shake down — really interrogate the seat for any crumbs it might be hiding.
You’d be surprised what you find — my oldest gets stickers at the grocery store that end up all over the harness straps, my youngest collects pebbles and hides them deep in his car seat! I always end up discovering something unexpected during this initial pat down phase.
2. Vacuuming and Spot Cleaning
After the big items have been shook loose, it’s time to vacuum any visible debris. A handheld vacuum with some nice attachments or a shop vac work great at getting in the nooks and crannies.
Utilize a toothbrush, sponge, and soap as needed to attack any stains. Nuna warns to not use any abrasive cleaners, such as bleach. Gentle soap is best; castile is a good mild soap that should do the trick or apply dish soap if you’ve got a real stubborn spot.
3. Detaching the Car Seat Cover and Padding
Due to the length of time the cover takes to dry, I like to get it going first before attacking the harness or buckles. Once you have the cover disassembled and washing you can spend time on other areas.
The Nuna car seat covers are all machine wash friendly — in cold water using mild soap — except for the infant insert wedge portion (sometimes called the ‘support wedge’), which is spot clean only.
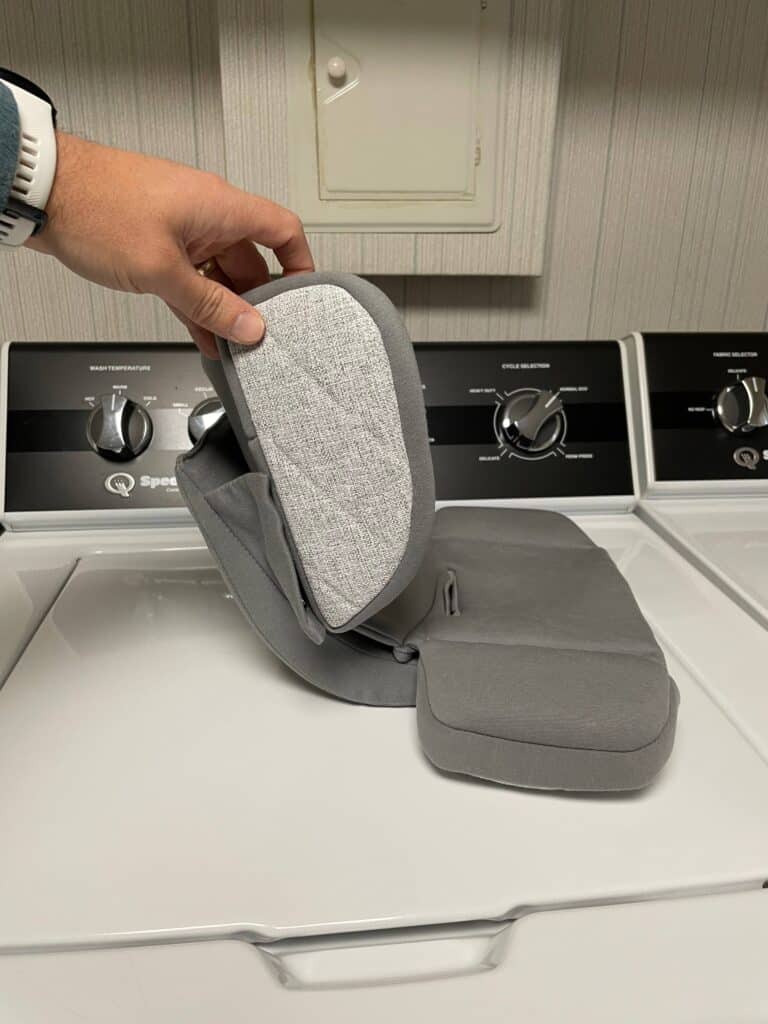
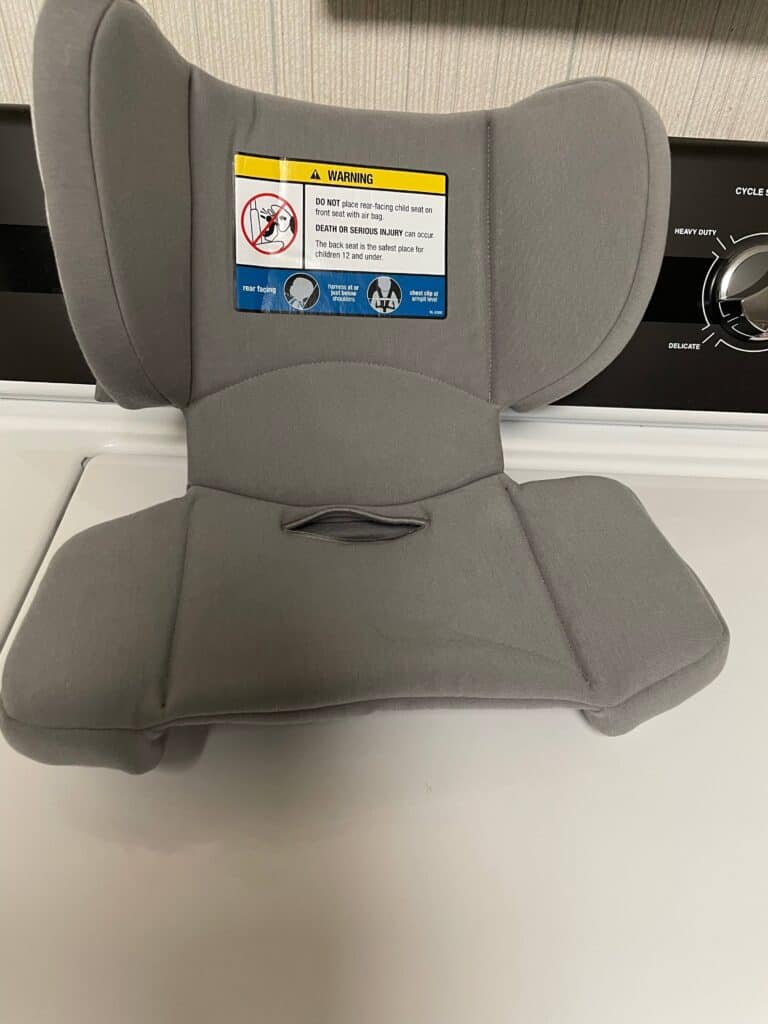
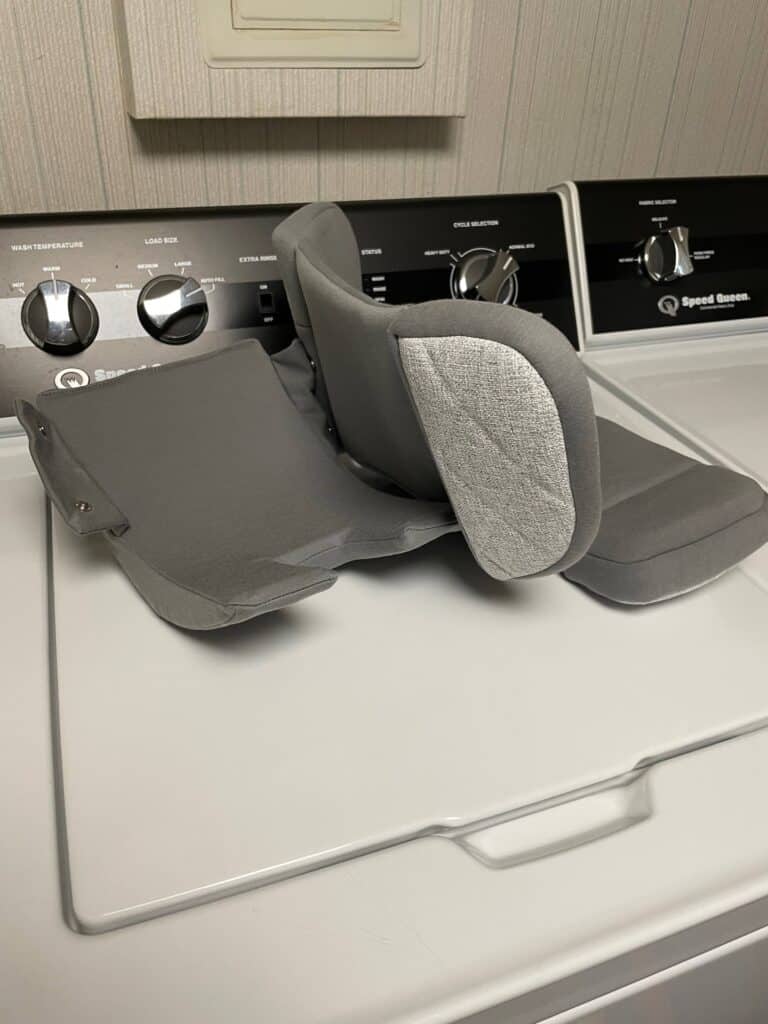
The REVV 360 infant insert wedge has a detachable back portion. This entire section of the cover is spot clean only, make sure you don’t run any part of the infant insert wedge through the washing machine.
The manual is full of great visuals which I find extremely helpful for disassembly.
If you’re really apprehensive, take a picture before you break down the seat. This way you can double check that it looks the same when it’s time to put everything back together again.
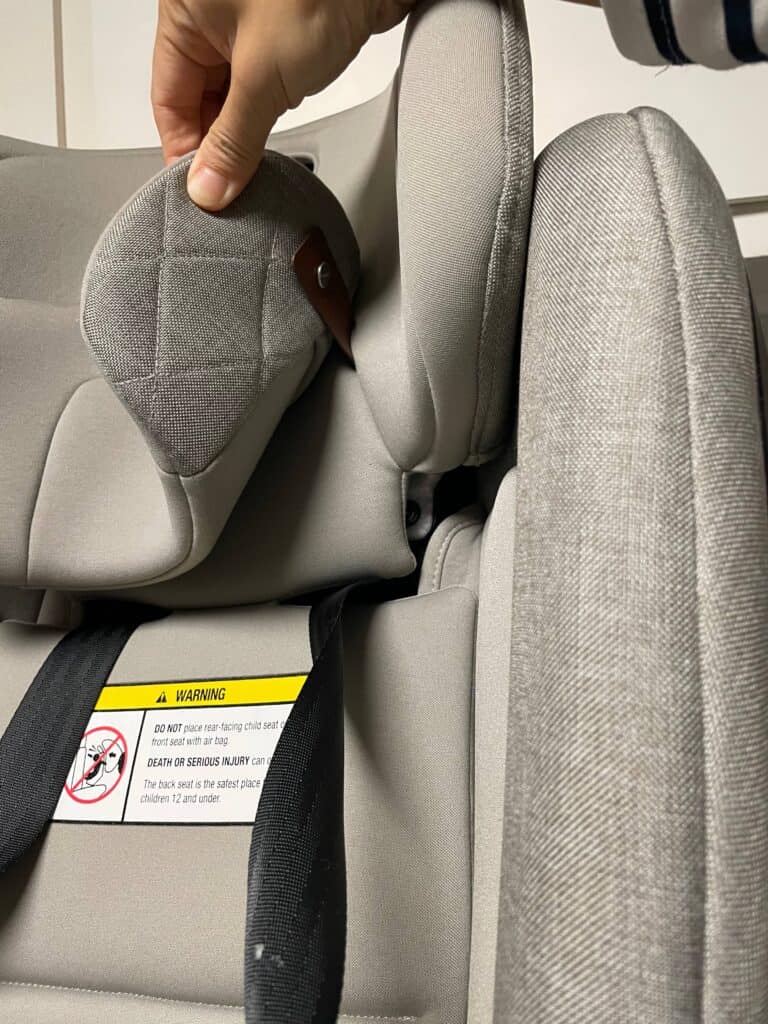
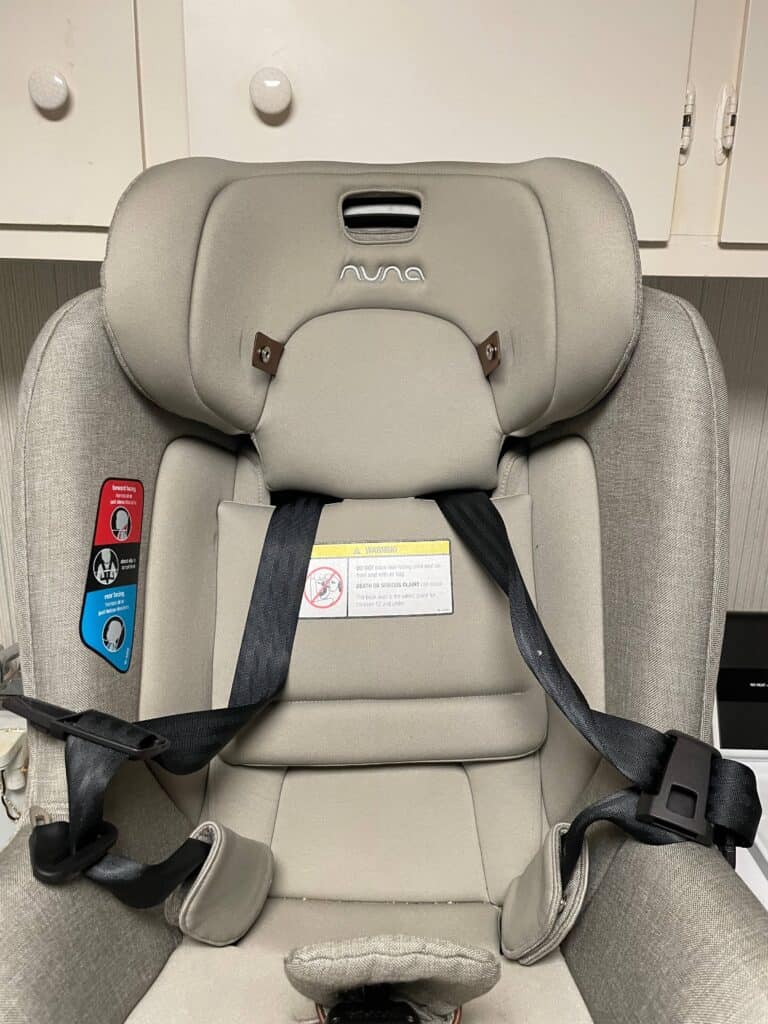
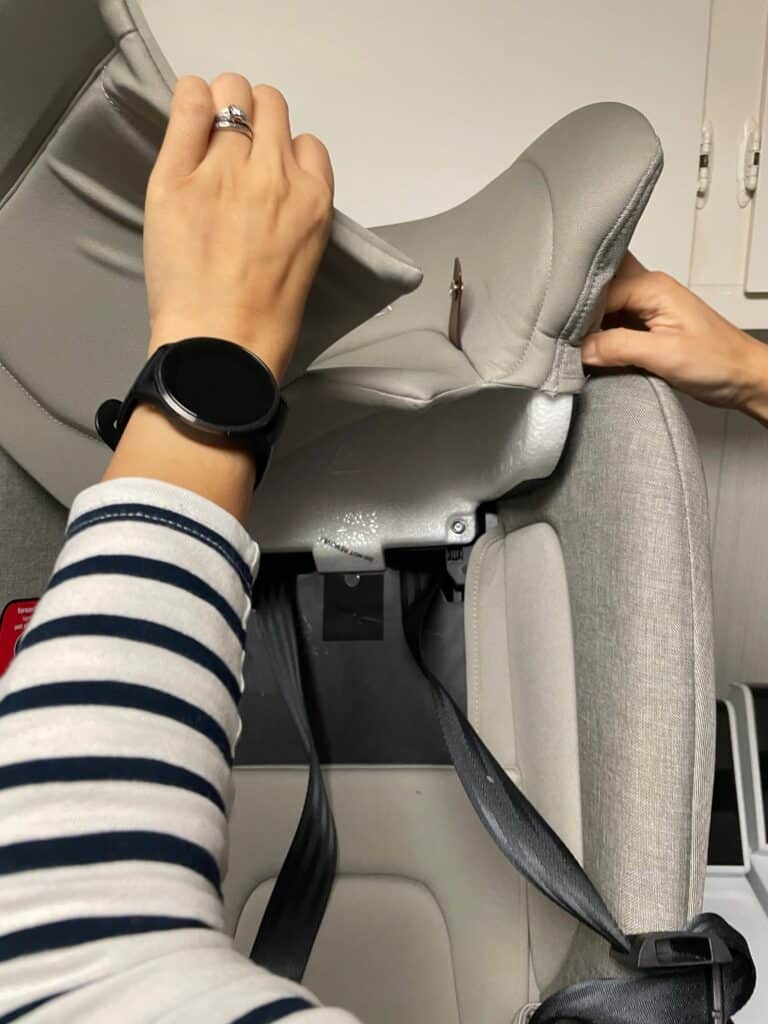
After a bit of wrestling, you shouldn’t have too much issue removing the car seat cover itself. Choose a mild detergent and drop it into the washer on gentle cycle using cold water.
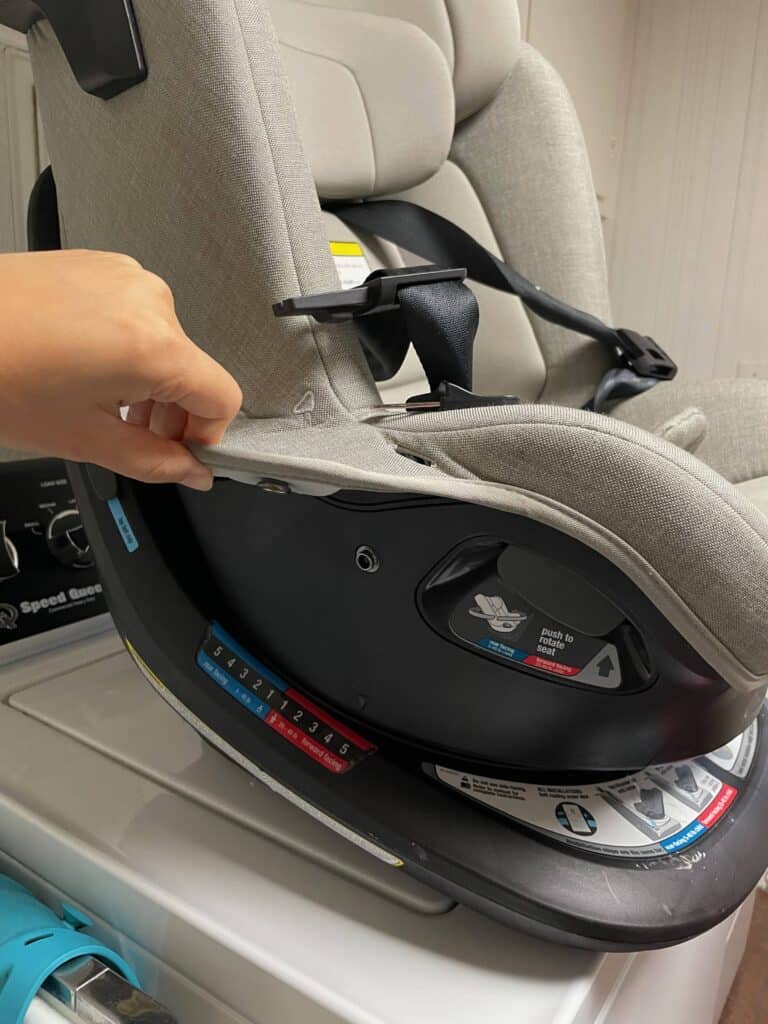
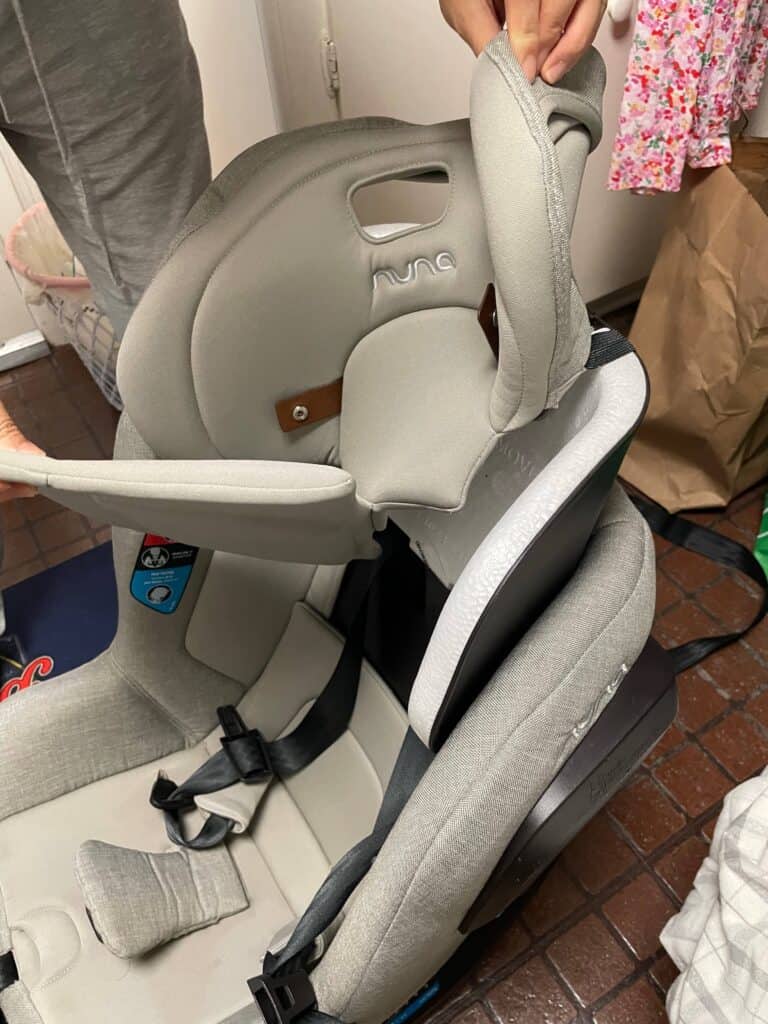
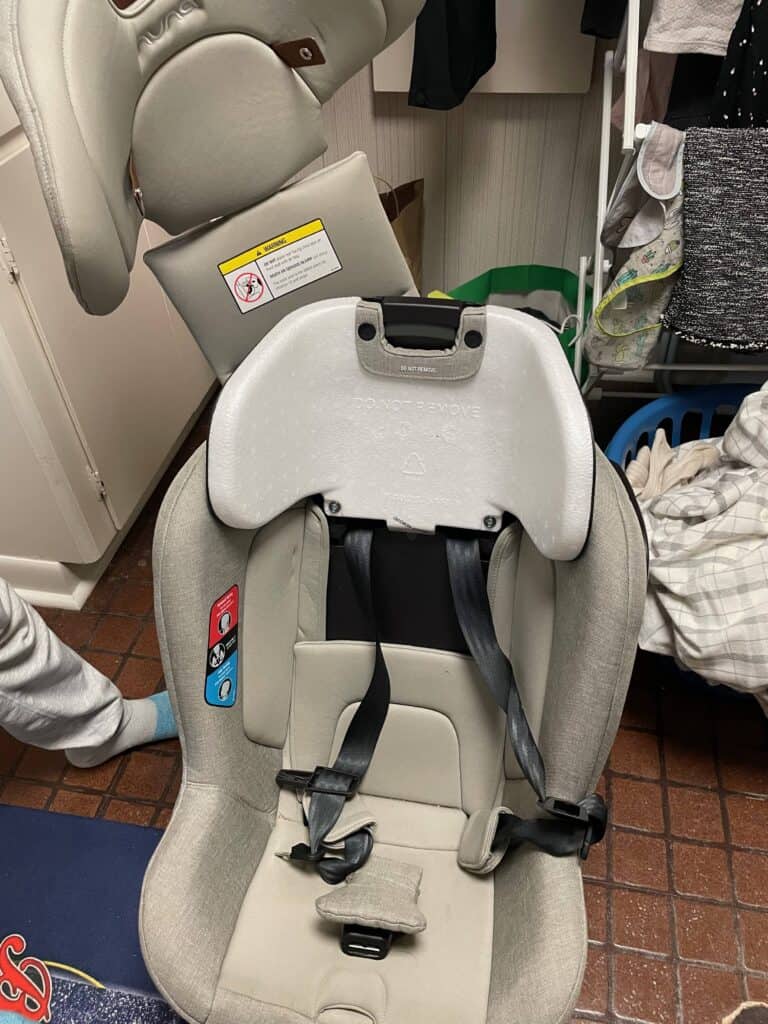
Unlike the infant car seat insert, the shoulder, hip, and crotch pads are all safe to be machine washed with the rest of the cover.
If you find any fault with this area of the seat, soiled beyond recognition or torn by your toddler, you can always purchase replace parts.
Nuna sells replacement inserts and buckle covers, under ‘Accessories and Extras’ on their website. I would recommend buying direct from Nuna to ensure a match.
Other car seat manufacturers may have different instructions, so if you ever change from Nuna be sure to double check before you machine wash. Some brands don’t allow soap, others recommend using an upholstery cleaner, etc.
4. Clean Straps are Happy Straps:
What you’re left with after you’ve removed the car seat cover, is the frame, buckles and belts. I like to attack the harness straps next as they typically require more time to dry than the frame.
Use warm water and mild soap where needed on the shoulder straps. Again, don’t apply any harsh cleaners such as bleach or baking soda.
Use water sparingly — don’t soak the harness straps or crotch buckle in water. Getting these bits soaking wet could cause damage. The car seat’s straps are crucial for your child’s safety, so handle with care.
5. Frame Cleaning a car seat
Car seats frames rarely sees the light of day, so this may be your only chance to make sure it gets a good clean.
I like to flip over the car seat and make sure all possible debris is shook loose. Vacuum up anything you can that’s made its way down into the frame. For me, it’s going to be my sons collection of pebbles and stones from the playground.
This is also where I typically find the remnants from an episode of car sickness or an old milk spit up (yuck). Whatever disgusting liquid you find (hopefully none), if its made its way here that means its probably had the chance to bake under your child for months now, making it difficult to remove.
Nuna recommends a damp cloth and towel dry, again warning against the use of any abrasive cleaners.
6. Drying with Sun and Air
Earth’s natural air drying unit – the sun – works wonders in eliminating odors and dampness. If the weather is not cooperating, a fan can be used to speed up the process. Give the seat enough time to air dry completely.
By not allowing the seat to completely dry you may trap excess moisture inside, which can lead to a few issues. The metal parts holding your child’s car seat together may become rusty, wet harness straps might weaken, or mold could develop in the seat.
Trying to speed up the process is difficult — concentrated heat such as a blow dryer may actually end up shrinking the fabric.
Avoid these problems by giving your seat the proper time to dry. To ensure car seats are smelling fresh and for the safety concerns mentioned, don’t reassemble with damp covers.
7. Putting It All Back Together
Make sure everything clicks back into place and is buttoned up correctly. I am super visual so I need the manual when it comes to reassembly.
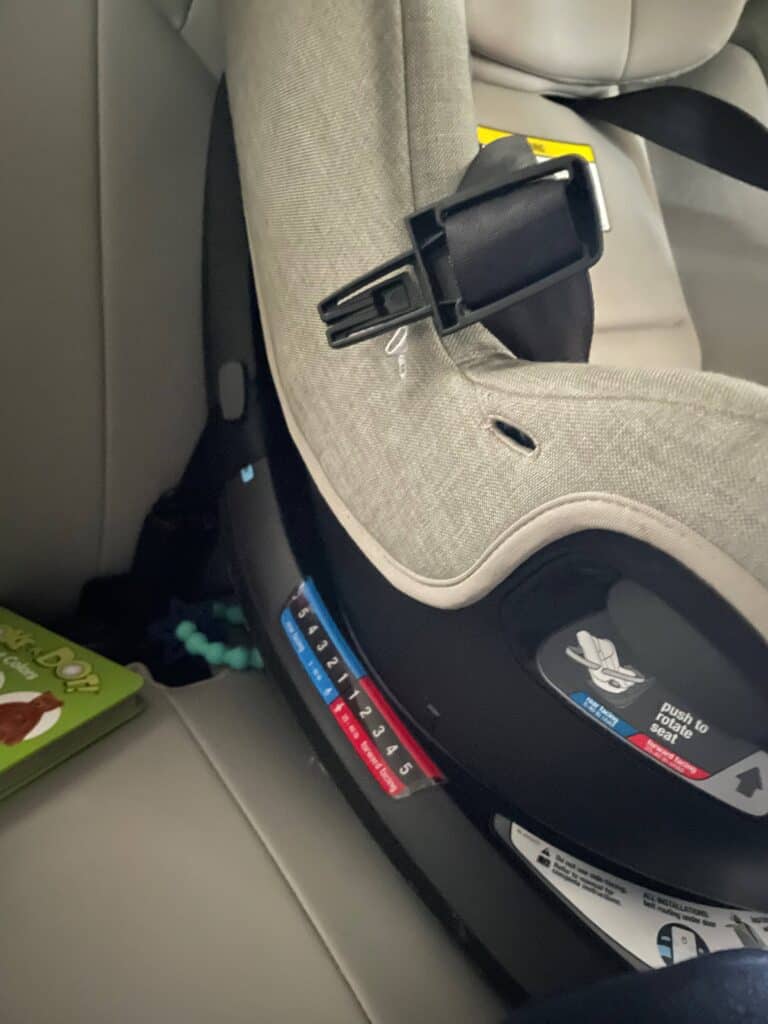
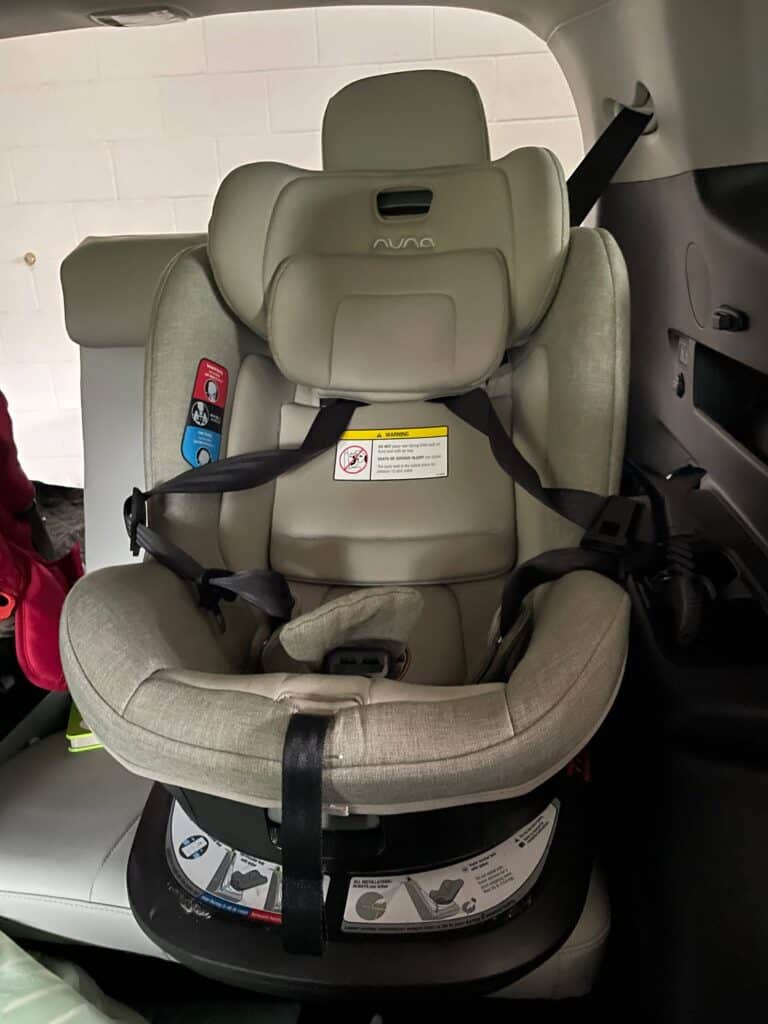
Now is a good time to consider any of the settings that you might want to change depending on your child’s stage in life. Is it time to adjust the head support level or recline positioning?
Perhaps you want to detach the back section of the infant wedge, or ditch it all together. You may be at the phase where you can rotate from back-facing to forward-facing if you are using a rotating car seat.
This is also your last chance to give the adult car seat under your child car seat a good clean before reinstalling.
Final Thoughts
If you have any technical questions or are really unsure about something, Nuna offers complimentary virtual car seat checks. Book a half hour consultation with a Nationally Certified Child Safety Passenger Technician free of charge via their website.
Nuna recommends children stay in the REVV 360 car seat until booster seats become an option at the age of 4 years old.
If your expecting or your child’s at a phase where it makes sense to switch, for multiple reasons (mainly due to the chronic back pain that accompanies parenthood), I highly recommend a rotating car seat like the REVV 360.
The bottom line on how to clean a Nuna car seat is getting familiar with the manual. You don’t want to get halfway into the process before realizing you’ve made a mistake.
Try to spot clean regularly, to avoid the dreaded deep clean altogether. Best case scenario is a warm sunny day to give your cover the time required to completely dry out.
Your Nuna car seat is an item you’ll use for quite some time, so you want to do your best to take good care of it!

